

Infrared saunas have become increasingly popular for their numerous health benefits, including detoxification, relaxation, and pain relief. While purchasing a pre-made infrared sauna can be costly, creating your own DIY version is an affordable and rewarding alternative. In this step-by-step guide, we’ll walk you through the process of building your very own infrared sauna right in the comfort of your home.

Materials Needed:
- Infrared heat panels
- Wood for framing (cedar is a popular choice for its natural resistance to moisture and insects)
- Insulation material (fiberglass or foam board)
- Vapor barrier (foil or plastic sheeting)
- Bench or seating area
- Sauna door
- Thermometer and hygrometer (optional but recommended for monitoring temperature and humidity)
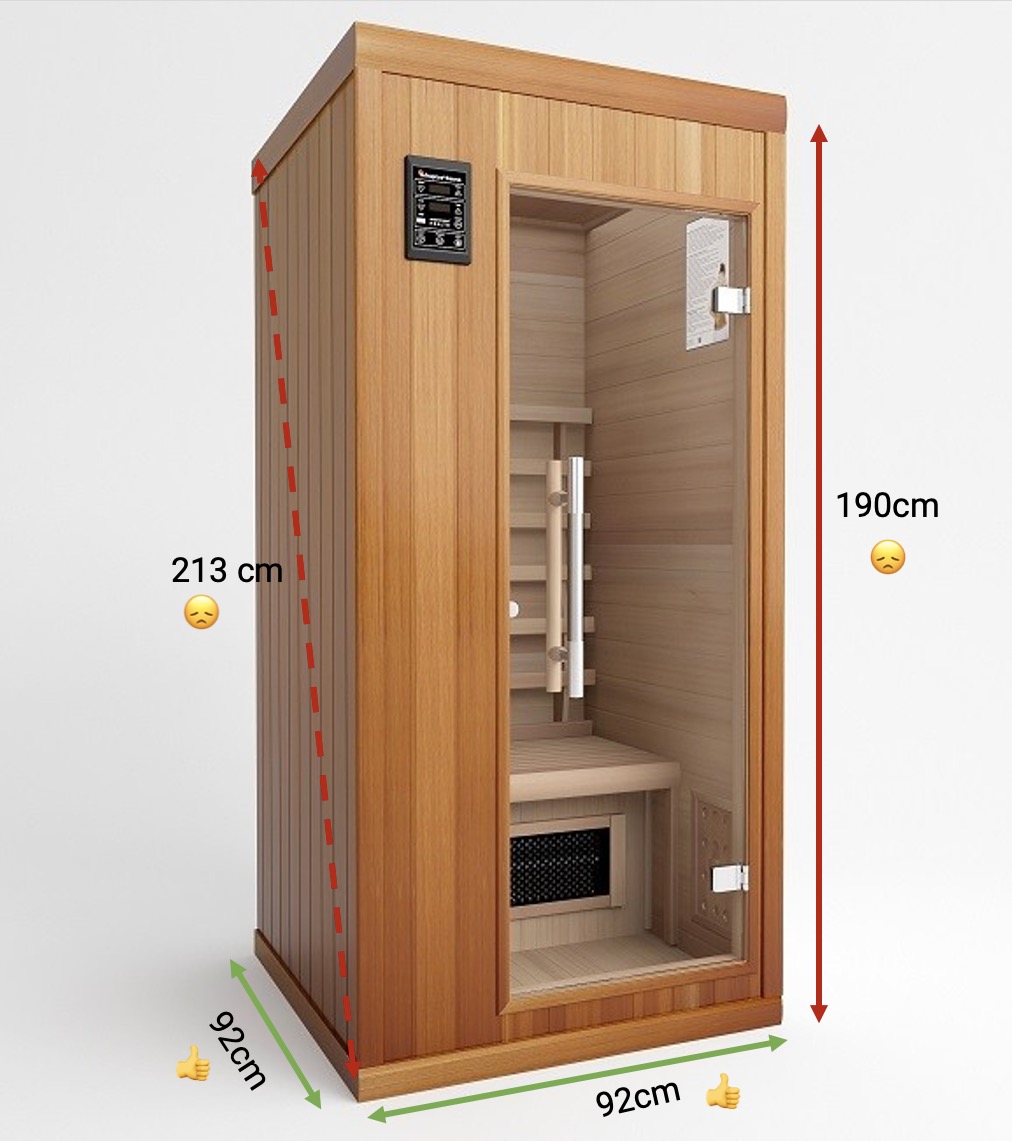
Step 1: Design and Plan
Before diving into construction, it’s essential to design and plan your sauna layout. Determine the size of your sauna based on available space and the number of occupants. Sketch out a blueprint, taking into account the location of heat panels, seating area, and door placement.
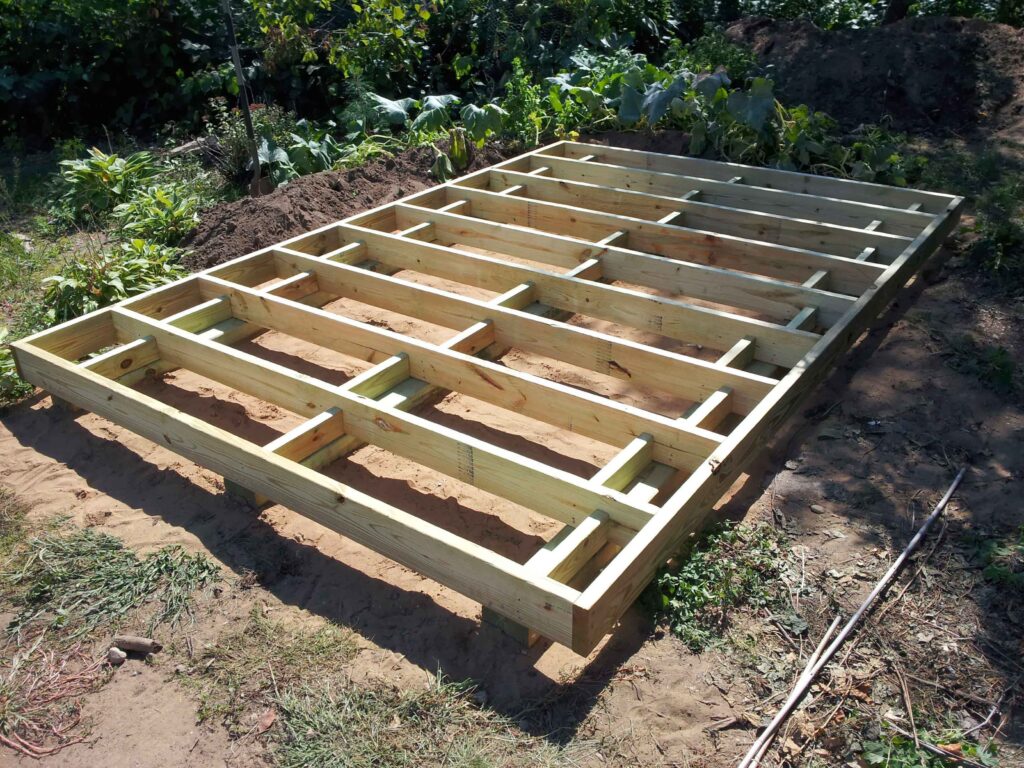
Step 2: Build the Frame
Using your chosen wood, construct the frame of your sauna according to your design. Ensure that the frame is sturdy and level, as it will provide the foundation for the rest of the sauna components.
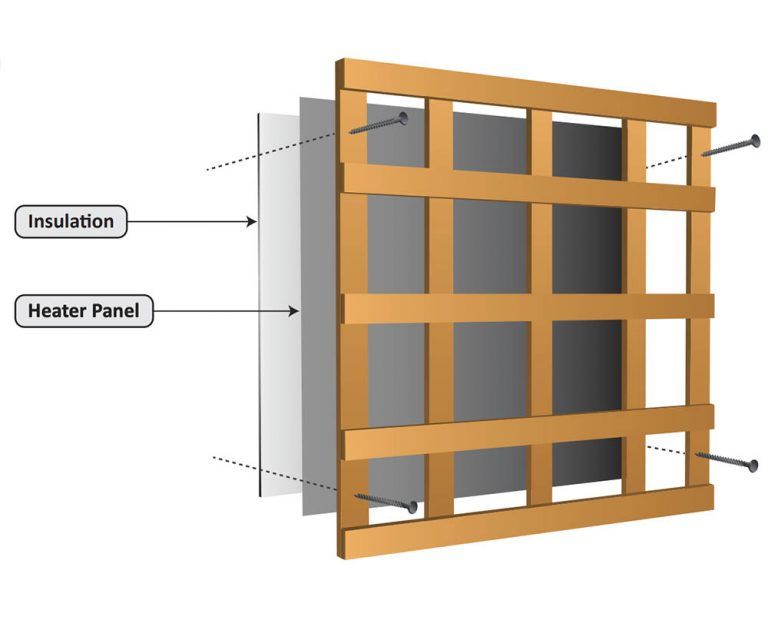
Step 3: Install Insulation
Once the frame is built, install insulation material between the studs to help retain heat and improve energy efficiency. This step is crucial for creating a sauna environment that reaches and maintains the desired temperature.
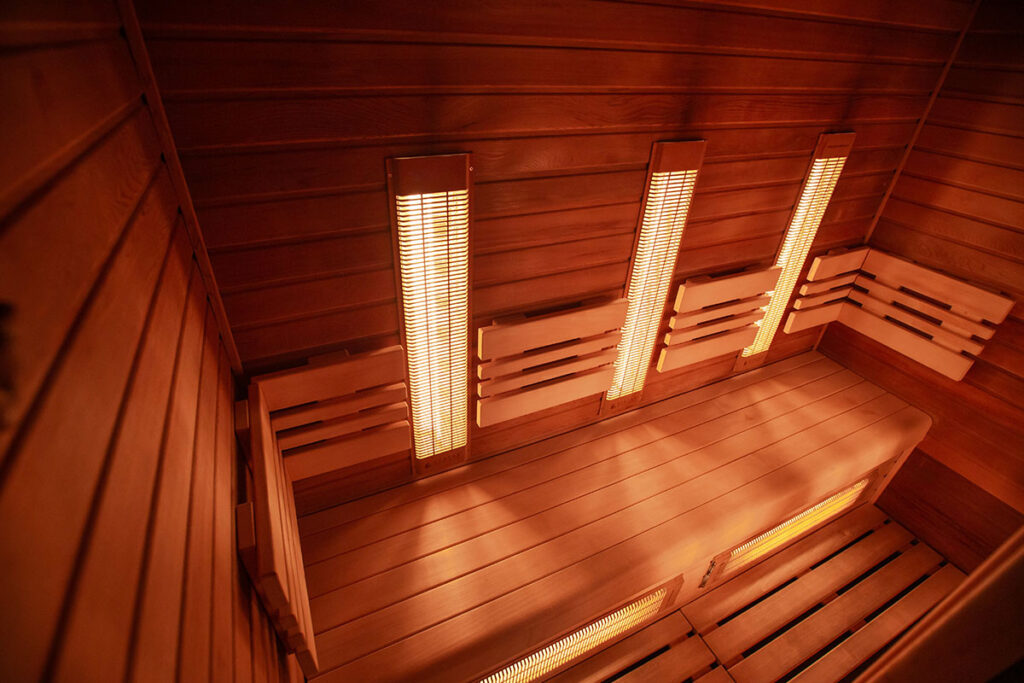
Step 4: Mount Infrared Heat Panels
Next, mount the infrared heat panels onto the interior walls of the sauna. Position the panels evenly to ensure consistent heat distribution throughout the space. Follow the manufacturer’s instructions for installation and wiring to ensure safety and proper function.
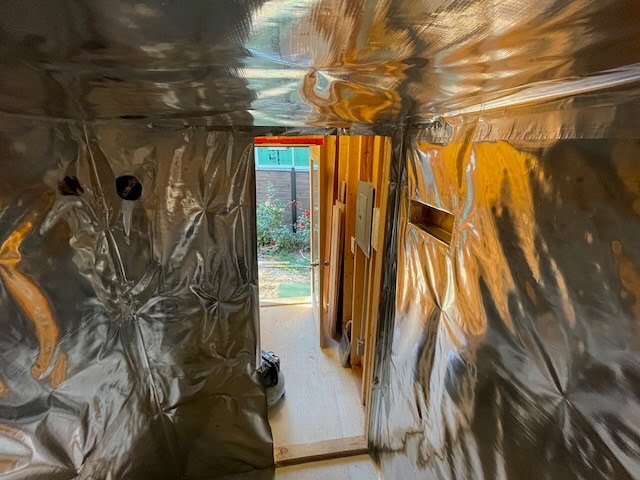
Step 5: Add Vapor Barrier
Cover the insulated walls with a vapor barrier to prevent moisture from penetrating the sauna. This barrier helps maintain a dry and comfortable environment inside the sauna and protects the integrity of the wood and insulation.
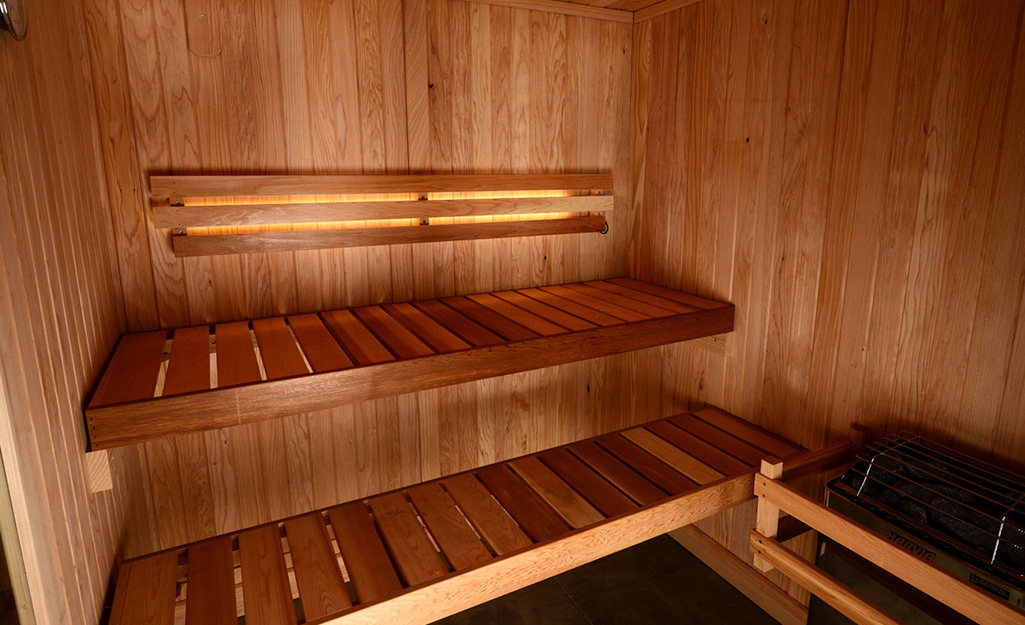
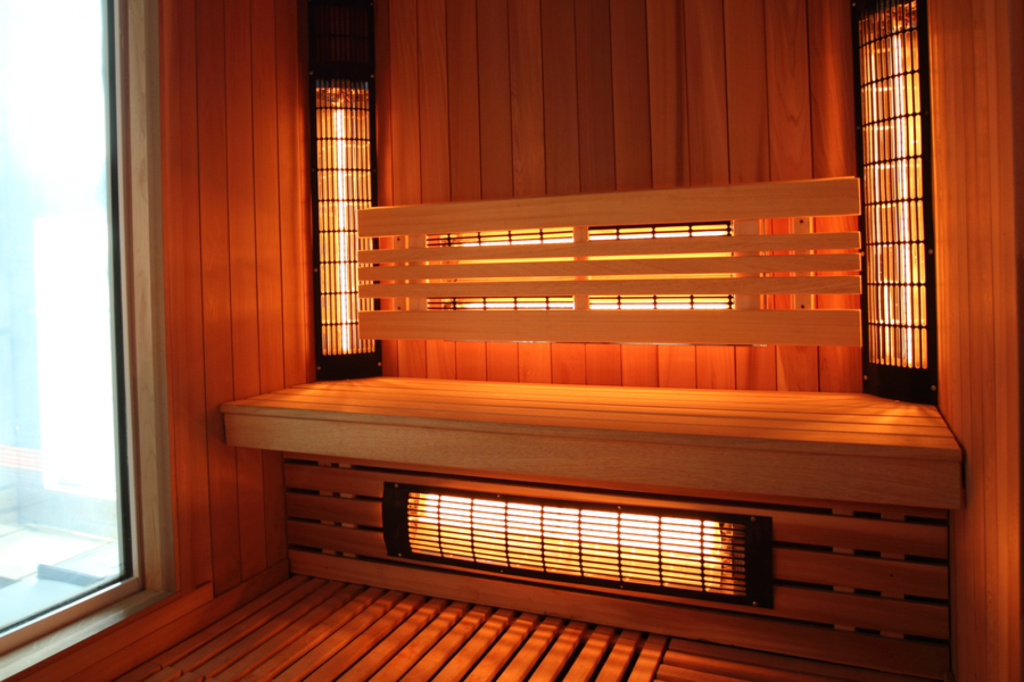
Step 6: Install Bench or Seating
Add a bench or seating area inside the sauna for occupants to sit or recline comfortably during use. Choose a material that can withstand high temperatures and humidity, such as cedar or teak, and ensure that it is securely attached to the frame.
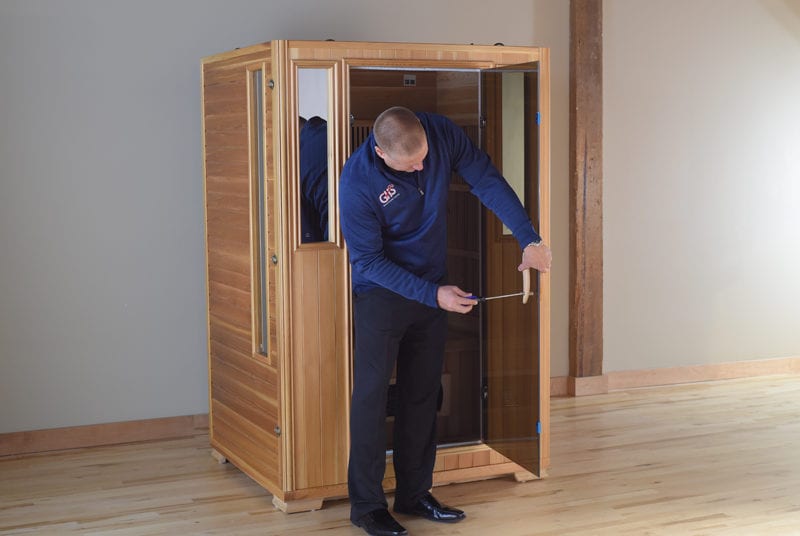
Step 7: Install Sauna Door
Install a sauna-specific door to seal the sauna and retain heat during use. Sauna doors are typically made of glass or wood and are equipped with a tight seal to prevent heat loss. Ensure that the door is properly insulated and opens smoothly.
Step 8: Test and Enjoy
Before using your DIY infrared sauna, perform a test run to ensure that it reaches the desired temperature and operates safely. Once everything is in working order, sit back, relax, and enjoy the soothing warmth and health benefits of your homemade sauna oasis.
Conclusion
Creating your own DIY infrared sauna is a rewarding project that allows you to enjoy the therapeutic benefits of sauna therapy without breaking the bank. By following these simple steps and investing a little time and effort, you can create a relaxation oasis right in the comfort of your own home. So why wait? Start building your DIY infrared sauna today and experience the ultimate in relaxation and rejuvenation.
About Us
Our mission is to provide a trusted and comprehensive resource hub where individuals can find inspiration, guidance, and practical tools to better themselves. Through our carefully curated content, we aim to address various aspects of personal development, including self-confidence, motivation, mindset, relationships, productivity, and overall well-being. Awaken the Champ is reader-supported. When you buy through links on our site, we may earn an affiliate commission.